Spring Framing Season Is Here — 7 Things Your Crew Is Doing Wrong
Listen. I've been on jobsites since the frost breaks every single year for the last 28 years. Spring framing season is the make-or-break window for residential builders. You get four, maybe five solid months of prime weather depending on where you sit on the map. And every single spring, I watch crews make the same boneheaded mistakes that cost them time, lumber, and profit.
I'm not here to sugarcoat it. If your crew is making any of these seven mistakes, you're hemorrhaging money. Full stop.
The material cost environment in 2026 means you can't afford sloppy work. Every board that gets cut wrong, every wall that goes up crooked, every day lost to a preventable screw-up — that's cash straight out of your pocket.
Let's get into it.
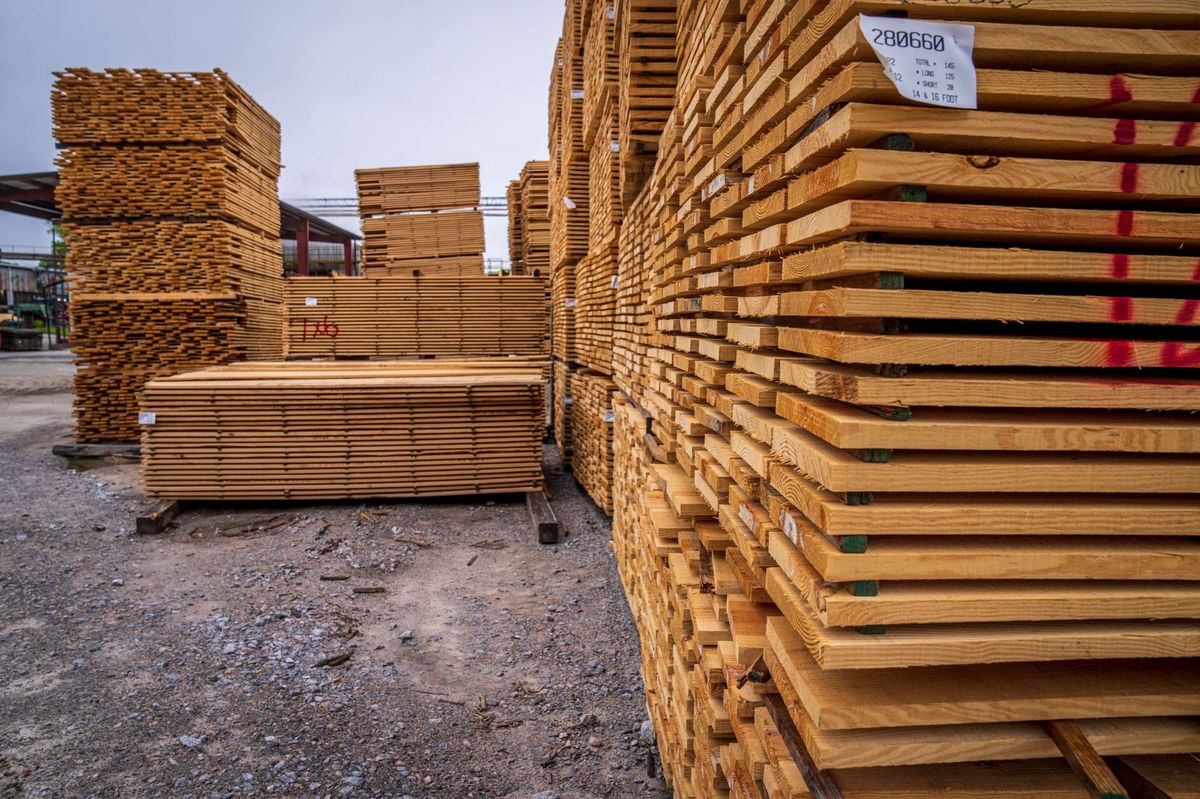
Mistake #1: Not Checking Lumber Moisture Content on Delivery
Here's the thing. Most framing crews just eyeball the lumber when it rolls off the truck. Maybe they check for obvious warps or splits. But almost nobody is pulling out a moisture meter and actually checking what they're about to nail into a permanent structure.
Spring lumber is notorious for being wet. Mills are pushing volume to meet the seasonal demand spike, and that wood hasn't always had time to dry properly. I've seen deliveries come in at 22-25% moisture content when you want to be at 19% max for framing — and ideally closer to 15%.
What happens when you frame with wet lumber? Crown issues. Warping after the drywall goes up. Nail pops six months later that the homeowner calls you about. Squeaky floors. Callbacks that eat your profit alive.
Pro tip: Spend $40 on a pin-type moisture meter and check five random boards from every delivery. If they're running over 19%, you either reject the load or you stack and sticker it for a week before you use it. Yes, it takes discipline. No, it's not optional.
I keep a Wagner Orion 930 in my truck at all times. Worth every penny of the $300 I paid for it. The pin-type cheapos work fine for framing lumber though.
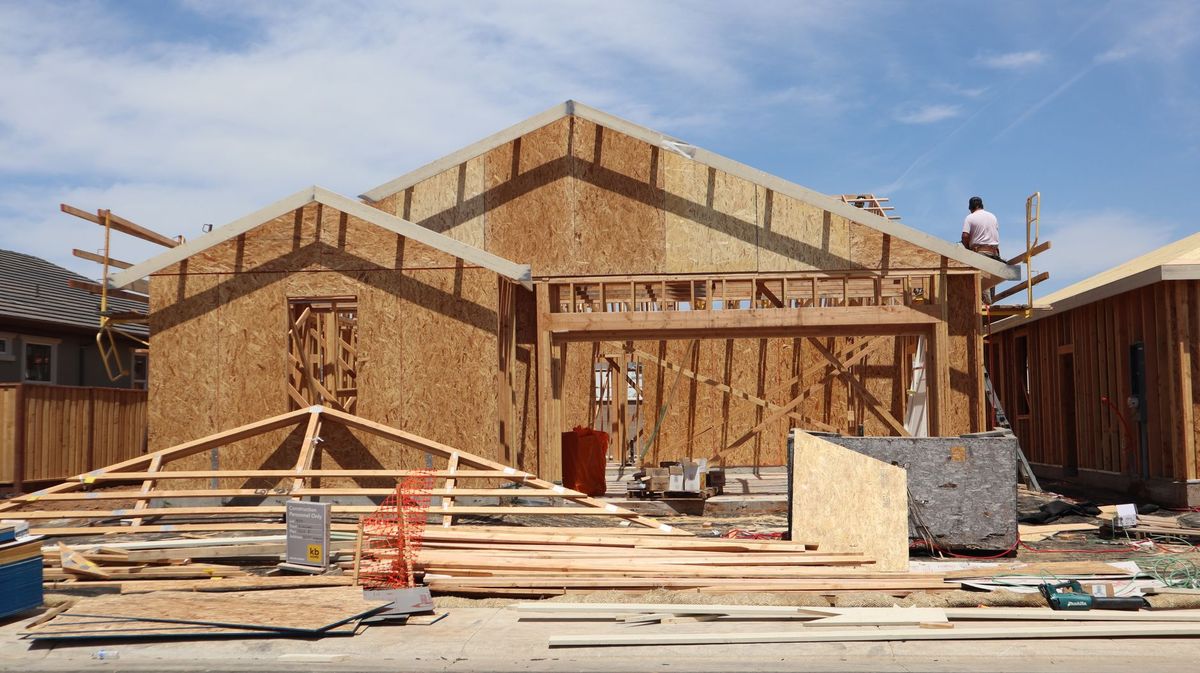
Mistake #2: Laying Out Walls on the Deck Instead of the Ground
I see this constantly and it drives me insane. Crew shows up, subflooring is down, and they start laying out and building walls right there on the deck.
The problem? You're working at elevation. You're limited on space. You can't spread out. And when it's time to tip those walls up, you've got guys standing on the edge of a platform with no fall protection trying to muscle a 40-foot wall section vertical.
Build your walls on the ground whenever the site allows it. Period. Especially on slab-on-grade projects — you've got all that beautiful flat concrete right there. Crane them up or tip them with a Skid Steer and some straps.
Even on basement or crawl-space projects, I build exterior walls on the ground and crane them to the deck. It's faster. It's safer. And the layout quality is better because you can actually spread your tape out without tripping over joist hangers.
Pro tip: If you must build on the deck, snap all your layout lines BEFORE you start cutting. Chalk the top plate line, chalk the bottom plate line, mark your king studs, cripples, and headers all at once. Assembly-line it. Don't build one wall at a time.
Mistake #3: Ignoring the Architect's Sheathing Schedule
This one costs people their shirts. The plans call for a specific nailing schedule for wall sheathing. Usually it's 6-inch on-center at the edges and 12-inch in the field for standard walls. But in high-wind zones or seismic areas? Those schedules tighten up dramatically.
I was on a project in coastal North Carolina last spring where the engineer called for 4-inch edge nailing on every panel. Four inches. My guys were hammering away at 6 inches because "that's what we always do." Inspector caught it. Every single panel on the south and west elevations had to be re-nailed.
That's not just the labor cost. That's schedule damage. That's your reputation with the GC. That's the kind of thing that gets you knocked off the bid list for the next project.
Read the plans. Read the structural notes. Read the sheathing schedule. Put it on a laminated card and hand it to every guy running a Bostitch coil nailer.
Pro tip: Take a photo of the sheathing schedule from the plans with your phone. AirDrop it to your lead framers. Make them set it as their lock screen wallpaper for the duration of the project. I'm dead serious.
Mistake #4: Not Pre-Cutting Headers and Rough Openings in Batch
Watch a disorganized crew frame a house. One guy is measuring a window opening, walking to the saw, cutting the header, walking back, nailing it in, then moving to the next window. Repeat 30 times.
Now watch a crew that knows what they're doing. One guy pulls every rough opening dimension from the window and door schedule. He writes them on a cut list. One saw operator cuts every header, every jack stud, every sill, and every cripple for the entire floor at once. Labels them with a lumber crayon by opening number. Stages them.
The assembly crew never waits for material. They just grab the next bundle and go.
I timed this on a 2,400-square-foot house last year. Pre-cut method: 6 hours saved over two days of framing. Six hours of crew time at $45-65 per hour loaded rate. You do the math.
With the workforce shortage hitting 501,000 unfilled positions, you can't afford wasted motion. Every minute counts.
Pro tip: Use a dedicated cut station with a miter saw for headers and a worm-drive Skilsaw for sheathing rips. Never have your framing crew waiting on cuts. Feed the beast.
Mistake #5: Sloppy Stair Layout
Listen. I can walk onto any jobsite and tell you within five minutes how good the framing crew is by looking at one thing: the stairs.
Stairs separate the professionals from the hacks. And spring is when most of the rough framing stairs go in for the year's housing starts. Q1 2026 is tracking at 1.38 million starts, which means there are a lot of stair stringers being cut right now. And a lot of them are being cut wrong.
The number one mistake is not accounting for the finish floor thickness on the first and last riser. If you've got 3/4-inch hardwood going on the main level and tile in the basement, your bottom riser on the basement stairs needs to be adjusted. Most guys just divide the total rise by the number of risers and call it done. Then the tile guy shows up and suddenly that first step is an inch shorter than the rest.
Code says your risers can't vary by more than 3/8-inch. Blow that and the inspector red-tags it. But more importantly, inconsistent risers are a trip hazard. People fall. People get hurt. People sue.
Pro tip: I always frame stairs with the finish floor thickness subtracted from the bottom stringer. Mark it clearly with a Sharpie and painter's tape: "BOTTOM RISER ADJUSTED FOR 3/4" FINISH." That way nobody comes behind you and "fixes" it.
Mistake #6: Not Protecting Lumber from Spring Rain
Spring means rain. Surprise — it rains in April. And yet I pull onto jobsites every week and see $15,000 worth of framing lumber sitting in the mud with no cover. Not even a tarp.
With lumber sitting at $480/MBF, that's not Monopoly money soaking into the ground. That's your margin. OSB is especially vulnerable — it swells at the edges when it gets wet, and once it swells, it never goes back. You'll feel every seam through the finish floor.
Here's what a smart crew does. Day one: lumber shows up, it goes on 4x4 stickers, off the ground. Minimum 4 inches of clearance. Tarp goes over the top. Not wrapped tight — draped so air can circulate underneath. You want protection from rain without trapping moisture.
If you're on a multi-phase project, coordinate your deliveries so lumber arrives no more than three days before you need it. JIT — just in time. Works for Toyota, works for framers.
Pro tip: Buy a 20x30 heavy-duty silver tarp from Harbor Freight for $30. It'll save you $2,000 in damaged lumber over a single spring season. Best ROI on any jobsite.
Mistake #7: Skipping the Daily Plumb-and-Line
I saved the most important one for last. And this is the hill I'll die on.
Every framing crew should be plumbing and lining their walls at the end of every single day. Not when the frame is done. Not when the inspector shows up. Every. Day.
Why? Because problems compound. A wall that's 1/4-inch out of plumb on Monday becomes a roof system that's 3/4-inch off by Friday. Crown in a top plate that doesn't get straightened becomes a hump in the roof sheathing. A bowed exterior wall becomes a window that won't install right.
The 20 minutes you spend at the end of the day with a string line, a plumb bob, and some diagonal braces saves you hours — sometimes days — of rework later.
My crews use a system. Last 30 minutes of every day: the lead framer runs a string down every top plate. He checks plumb on every corner and every bearing wall. Anything out of tolerance gets braced and corrected right then. We start the next morning knowing everything is straight, plumb, and true.
Pro tip: Invest in a Stabila 96-inch level. Yeah, it's $150. But it's the most accurate level on the market and it's built like a tank. My oldest one has been on jobsites for 11 years and still reads true.
The Bottom Line
Spring framing season doesn't care about your feelings. It moves fast, the pressure is high, and the margins are thin. If your crew is making any of these seven mistakes, you're leaving money on the table and quality on the floor.
Fix these things. Today. Not Monday. Today. Print this list, hand it to your foremen, and have a conversation about it at tomorrow's 6 AM huddle.
The crews that dominate spring season aren't the fastest. They're the most disciplined. They do the boring stuff right, every single time.
That's how you build 50 houses a year without a single callback.
Frequently Asked Questions
What moisture content should framing lumber be before installation?
You want framing lumber at 19% moisture content or below. Ideally, you're in the 12-15% range, but that's tough to get with green lumber in spring. The key is testing every delivery with a pin-type or pinless moisture meter. If boards are running above 19%, either reject the delivery or stack and sticker the lumber for several days to let it air dry. Framing with wet lumber leads to warping, nail pops, squeaky floors, and callbacks that destroy your profit margin.
How do I calculate stair risers when finish floor heights differ between levels?
Start with the total rise — the vertical distance from finished floor to finished floor. Divide by the number of risers to get your unit rise. The critical step most crews miss is adjusting the bottom stringer cut for the difference in finish floor thickness. If the upper floor gets 3/4-inch hardwood and the lower level gets 1/4-inch vinyl, subtract 1/2-inch from your bottom riser height. Always mark the adjustment clearly on the stringer so no one "corrects" your work later. Code allows a maximum 3/8-inch variation between risers.
What's the correct nail spacing for wall sheathing in high-wind zones?
It varies by jurisdiction and engineering requirements, but in high-wind zones you'll commonly see 3-inch or 4-inch on-center edge nailing with 6-inch field nailing. Seismic zones have their own schedules too. The only correct answer is to read the structural engineer's sheathing schedule on your specific plans. Never default to "what we always do." Incorrect nail spacing is one of the most common red-tag items, and re-nailing an entire elevation costs a fortune in labor and schedule delays.
How far in advance should I order framing lumber in spring?
Place your lumber orders two to three weeks before you need it to lock in pricing and availability, but schedule delivery no more than three days before you'll use it. This just-in-time approach minimizes weather exposure and site damage. Spring is the busiest ordering season for lumber yards, so lead times can stretch. Call your supplier in February to discuss your spring schedule and get on their delivery calendar early. Keep lumber off the ground on stickers and tarped loosely to allow airflow while keeping rain out.
READ NEXT: Material Costs Squeeze Margins in 2026