I've Framed 400 Houses — Here's What Changed in the Last 5 Years
I framed my first house in 1998. It was a 1,400-square-foot ranch in suburban Ohio, and I was 19 years old hauling lumber for a crew that had been doing it the same way since the 1970s. Chalk lines. Hand-nailing. 2x10 floor joists at 16 on center. Plywood sheathing nailed with a 28-degree Bostitch.
I've framed roughly 400 houses since then. And I'm telling you straight — more has changed in the last five years than in the previous twenty combined.
The materials are different. The codes are different. The tools are different. The labor is different. And the expectations — from architects, from engineers, from homeowners, from inspectors — have shifted dramatically.
If you're framing houses the way you did in 2020, you're already behind. Here's what's changed and why it matters.
Engineered Lumber Has Taken Over
Listen. I grew up framing with solid-sawn lumber. Douglas Fir. Southern Yellow Pine. Hem-Fir. You'd walk into the lumber yard and pick your joists, your headers, your beams. You'd sight down each board for crown. You'd know by the weight whether it was dry or not.
Those days are fading fast. On the last 50 houses I've framed, engineered lumber makes up 60-70% of the structural framing by board feet. And that percentage is going up every year.
I-joists have almost completely replaced 2x10 and 2x12 floor joists in production housing. A 9-1/2" TJI handles the same span as a 2x10 but it's lighter, straighter, and doesn't crown, twist, or shrink. Floor systems are flatter, squeaks are fewer, and the plumber and HVAC guys can cut knockouts through the web without compromising structural integrity.
The downside? I-joists are more sensitive to point loads and concentrated forces. You can't just toe-nail a bearing wall on top of an I-joist the way you could on a solid 2x10. You need web stiffeners. You need blocking panels. You need to follow the manufacturer's installation guide to the letter, because these aren't just boards — they're engineered components with specific load paths.
LVL (Laminated Veneer Lumber) headers and beams are standard now. I can't remember the last time I built a header out of doubled 2x12s. LVL is stronger, dimensionally stable, and available in depths and lengths that solid lumber simply can't match. Need a 24-foot clear span beam? That's a 5-1/4" x 14" LVL. Try finding a solid-sawn beam that does that.
LSL (Laminated Strand Lumber) is showing up in rim boards, tall wall studs, and garage door headers. It's straighter than dimensional lumber and available in 24-foot lengths, which means fewer joints on long runs.
The trade-off for all this engineered lumber? You need to actually read the engineering documents. Every I-joist has a span table. Every LVL has a load rating. Every connection has a specified fastener schedule. Miss any of it and you fail inspection — or worse, you build something that doesn't work.
Pro tip: Keep the manufacturer's installation guides in a binder in your truck. Weyerhaeuser, LP, and Boise Cascade all have excellent technical support lines. When I hit an unusual condition — a cantilevered I-joist, a multi-ply LVL with a notched bearing — I call the manufacturer's engineering hotline. Free service, expert answers, and it covers your liability.
The Code Got Tougher
The 2021 IRC (International Residential Code) brought some significant changes, and many jurisdictions are just now adopting it in 2025-2026. If your local code authority just updated, you need to know what changed.
Continuous load path. This isn't new conceptually, but the enforcement is getting stricter. Every house now needs a documented continuous load path from the roof to the foundation. That means hurricane clips or straps at every rafter-to-top-plate connection. Hold-downs at shear wall ends. Anchor bolts at the sill plate. The days of toe-nailing a rafter to a top plate with three 16d nails and calling it good are over in most jurisdictions.
Braced wall requirements. The prescriptive braced wall panel requirements got more complex. The amount of shear wall needed per linear foot of exterior wall has increased, especially in higher seismic and wind zones. This means more plywood or OSB sheathing with tighter nailing schedules, and in some cases, dedicated hold-down hardware at every braced wall panel.
Energy code integration. The 2021 IECC (International Energy Conservation Code) is being adopted alongside the IRC, and it directly impacts framing. Advanced framing techniques — 2x6 studs at 24" on center, single top plates with metal plates at splices, insulated headers, two-stud corners with drywall clips — are now effectively required to hit the energy code's thermal bridging requirements in Climate Zones 4 and above.
This is a fundamental change in how we frame exterior walls. I grew up framing 2x4 walls at 16" on center with double top plates. That's still code-compliant for structure in most areas, but it doesn't meet energy code without continuous exterior insulation (which adds cost and complexity).
Switching to 2x6 at 24" OC with single top plates and insulated headers is a better thermal envelope and actually uses less lumber — about 15-20% less by board feet. But it requires more precision and more engineering.
Pro tip: If your jurisdiction is adopting the 2021 IRC/IECC, attend the code adoption meetings. Understand what's changing and when. Build relationships with your local inspectors before they start enforcing the new code. A 30-minute conversation with the building official can save you from failing inspections on your first few projects under the new code.
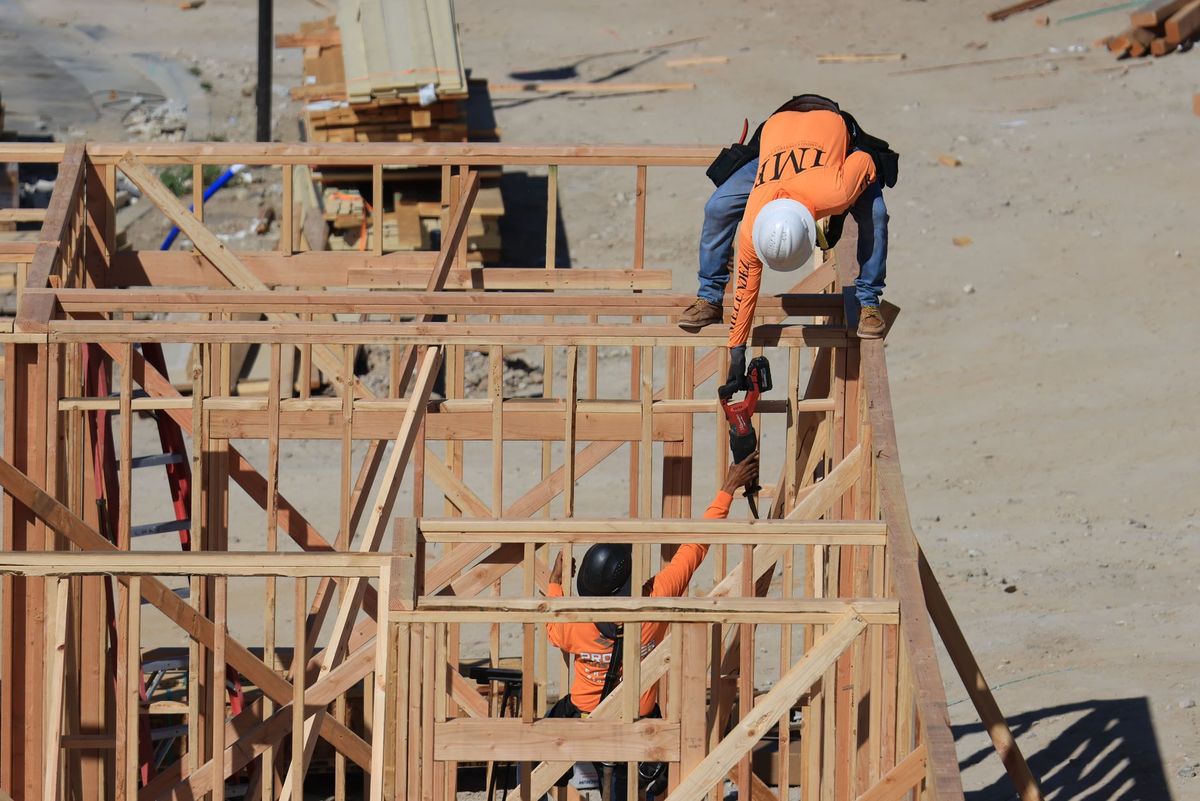
Cordless Tools Changed the Workflow
Five years ago, cordless tools on a framing jobsite were limited to drills and maybe an impact driver. The nailers were all pneumatic. The circular saws were all corded. And every framing site had a compressor running all day and extension cords snaking across the deck.
In 2026, my crew runs almost entirely cordless. Milwaukee M18 FUEL framing nailers. DeWalt FLEXVOLT circular saws. Makita 40V XGT rear-handle Skilsaws. Cordless Sawzalls for rough cutting. Cordless oscillating tools for flush cuts.
The productivity improvement is real and measurable. I tracked labor hours per square foot of framing on five houses in 2021 (fully pneumatic) and five houses in 2025 (fully cordless). The cordless jobs averaged 12% fewer labor hours per square foot.
Why? No hose management. No compressor setup and teardown (30 minutes per day). No tripping hazards. No guys waiting because someone kinked the hose three rooms away. No generator running for corded saws.
The batteries are finally good enough. A Milwaukee M18 High Output 12.0 Ah battery runs a framing nailer for 500+ nails. That's enough for a full morning of wall framing without swapping. The DeWalt FLEXVOLT 9.0 Ah battery powers a circular saw through 150+ cuts on a charge.
Yes, the upfront cost is higher. Outfitting a crew of four framers with cordless nailers, saws, and impacts runs about $6,000-8,000 in tools and batteries. But you eliminate the compressor ($800-1,200), hoses ($600), the generator ($1,500-2,500), fuel costs ($150/month), and maintenance on all of that equipment.
Pro tip: Buy more batteries than you think you need. I run a 2:1 ratio — two batteries per tool on site. While one is in the tool, the other is on the charger. We set up a charging station in the garage or on a folding table near the work area. Never wait for a battery. Time is money.
Labor Changed Everything
Here's the hardest truth. The labor market has fundamentally changed the way framing crews operate, and it's not going back.
The workforce gap of 501,000 unfilled construction positions means I can't staff my crews the way I did in 2018. I used to run 6-person framing crews. Now I run 4-person crews and compensate with better tools, more prefabrication, and smarter sequencing.
The average age of my framers has dropped from 38 to 29 over the last five years. That means more training investment, more supervision on complex tasks, and more patience with learning curves. But it also means a workforce that's more comfortable with technology — they'll use a construction calculator app, they'll read a digital plan set on a tablet, and they'll operate a layout laser without complaining that "we didn't used to need that."
I've also started cross-training framers in basic mechanical rough-in. On smaller projects, my framing crew can install PEX water lines and drill HVAC penetrations, which reduces the number of subcontractors on site and shortens the schedule. This only works with willing, trainable people — and the younger workforce is more open to it.
Compensation has changed too. Five years ago, a journeyman framer in my market made $22-26/hour. Today, $30-38/hour is standard. With the material cost pressure on every job, those labor costs mean you need to extract maximum productivity from every crew member.
Pro tip: Invest in training. I send each crew member to one manufacturer training event per year — Weyerhaeuser's I-joist installation class, Simpson Strong-Tie's connector workshop, or a code update seminar. The knowledge pays dividends in fewer inspection failures, faster installation, and better quality. Plus, the crew members feel valued, which helps retention in a brutally competitive labor market.
Sheathing and Air Barriers — The New Frontier
Five years ago, we sheathed walls with 7/16" OSB, wrapped the house with Tyvek, and called it done. The air barrier was whatever the house wrap provided, and honestly, nobody was testing it.
That world is gone. Energy codes now require measurable air tightness — typically 3-5 ACH50 (air changes per hour at 50 pascals of pressure) for new residential construction. That means the building envelope has to be tight, and the framing crew is responsible for a huge portion of that tightness.
What's changed in practice:
Zip System sheathing has become the default on at least half the houses I frame. The integrated WRB (weather-resistive barrier) eliminates a separate house wrap step. Tape the seams with Zip tape, and you have a sheathing layer and an air/water barrier in one product. It costs more per sheet than OSB + Tyvek, but the labor savings more than offset it. One pass instead of two.
Aerosolized sealants like AeroBarrier are being used on some high-performance homes to seal micro-leaks in the framing that you can't address with tape or caulk. A technician pressurizes the house and sprays a fog of acrylic sealant particles that seek out and plug air leaks. It's remarkable technology. I've seen a house go from 4.5 ACH50 to 1.8 ACH50 in 90 minutes.
Bottom plate sealant is now required in most jurisdictions — a bead of acoustical sealant or gasket between the bottom plate and the subfloor or slab to stop air infiltration at that joint. Simple but effective.
For framing crews, this means your work has to be tighter. Gaps between sheathing panels, missed caulk beads, and sloppy tape jobs don't just look bad — they fail a blower door test, which means you're going back to fix them.
Prefabrication Is Growing — And It Works
Five years ago, prefab wall panels were a novelty. Today, they're becoming standard practice for the production builders I work with.
I prefab exterior wall panels in a rented 3,000 SF warehouse space. Panels arrive on site pre-sheathed with Zip System, windows rough-openings framed, and hold-down hardware pre-installed. A 2,000 SF house worth of wall panels loads onto a flatbed trailer and gets set with a boom truck in 4-5 hours.
Compare that to stick-framing the same walls on the deck: 2 full days of layout, cutting, assembly, sheathing, and taping.
The prefab approach works because:
- Quality: Panels are built on a flat, level table in a covered space. No wind, no rain, no awkward positions. The quality is consistently better than field-built walls.
- Speed: Set day is exciting. You go from a bare deck to a fully sheathed house in one day. Neighbors come out and watch.
- Reduced waste: My material waste dropped 22% on my last big project using prefab, because I cut from a plan on a table instead of eyeballing it in the field.
- Weather independence: I build panels rain or shine. The field schedule only matters for set day and roof framing.
The barrier is the upfront investment — you need a space, a framing table, and a truck or trailer for delivery. But if you're framing 20+ houses a year, the payback is quick.
Pro tip: Start small with prefab. Build just the exterior wall panels for your next project. Leave the interior walls, floor system, and roof for field framing. Get comfortable with the workflow before you try to prefab everything. The logistical learning curve is real — panel sequencing, truck loading order, crane coordination — and you want to make mistakes on a small scale before you scale up.
What Hasn't Changed
For all the changes I've described, some fundamentals haven't moved. And they never will.
A plumb wall is still plumb. A level floor is still level. A square corner is still square. No amount of technology, engineered lumber, or code changes replaces the basic craft of putting straight pieces of wood in the right places at the right angles.
The carpenters who thrive in 2026 are the ones who mastered the fundamentals decades ago and then adapted to the new materials, codes, and tools. They don't cling to the old ways out of stubbornness. They don't chase every new thing out of novelty. They evaluate each change against a simple question: does this make my framing better, faster, or more profitable?
If yes, they adopt it. If no, they skip it.
That's what 400 houses teaches you. Not every change is an improvement. But refusing to change at all is a guaranteed path to irrelevance.
Frequently Asked Questions
Is advanced framing (2x6 at 24" OC) as strong as traditional 2x4 at 16" OC?
Yes, for most residential applications. A 2x6 at 24" on center provides more than adequate structural capacity for bearing loads in standard two-story residential construction. The studs are individually stronger (2x6 vs. 2x4), and the wider spacing is compensated by the increased section modulus of each stud. The single top plate used in advanced framing requires metal plate connectors at splices and above openings, which actually creates more predictable load transfer than a double top plate with staggered joints. The engineering is sound. The one area where 24" OC requires attention is drywall hanging — you need 5/8" drywall instead of 1/2" to prevent deflection between studs, which adds about $0.05 per square foot of wall area.
How do I transition my crew from pneumatic to cordless framing nailers?
Transition gradually over 2-3 projects. Start by introducing one or two cordless nailers alongside your existing pneumatic setup. Let your most open-minded framers try them first — they'll become advocates who convince the skeptics. The main adjustment is the recoil feel — cordless nailers have a different impulse than pneumatic because the gas spring or flywheel driving mechanism has a slightly different response curve. Most framers adapt within 2-3 hours of use. Keep your compressor and pneumatic guns on site for the first project as backup. By the second project, nobody will touch them. Important: buy enough batteries and chargers upfront. Nothing kills adoption faster than guys standing around waiting for a battery to charge.
What's the biggest code change coming that framers should prepare for?
Watch the 2024 IRC adoption cycle, which many jurisdictions will implement in 2026-2027. The biggest impact item is likely the enhanced continuous insulation requirements for Climate Zones 4-8. The code is moving toward requiring continuous exterior insulation on all frame walls in cold climates, which fundamentally changes the sheathing-to-cladding attachment method. Framers will need to learn proper furring strip installation over rigid foam, and window and door installation details change significantly with thick exterior insulation layers. Start attending manufacturer training on exterior insulation systems now.
Are prefabricated wall panels worth it for a small framing company doing 10-15 houses per year?
At 10-15 houses per year, prefab can work if you find an affordable space and keep the setup simple. You don't need a $200,000 automated panel line — a flat table, a chalk line, and your existing framing crew can build panels on rainy days or between projects. The minimum viable setup is a 2,000 SF covered space (a rented warehouse bay), two 4x20-foot framing tables built from LVL and plywood, and a flatbed trailer for delivery. Total investment: $15,000-20,000 for the tables and equipment, plus $1,000-2,000/month for the space. At 12 houses per year, the labor savings on wall framing alone (roughly 1.5 days per house) pay back the investment in the first year. Start with just exterior walls and add complexity as you refine your process.
READ NEXT: Why Every Framing Crew Should Switch to 21-Degree Nailers